This Sous Vide Char Siu is the most stress-free way to make char siu at home. I honestly hate making char siu the traditional way because I always overcook it. The slices of meat are very thin so if you do not monitor the temperature closely, it can overcook in a matter of minutes. But this method is failproof, and it is super easy.
Can't get enough of Sous Vide? Try my Sous Vide Hainan Chicken and Sous Vide Teriyaki Chicken next!

🥡 About This Recipe
Growing up, I remember going to Chinatown to get char siu with my parents on the weekend. The meat was always juicy, slightly sweet, and very flavorful. My favorite part was the slightly charred and caramelized outside which you could tell had been roasted for many hours.
Recently, I tried cooking char siu in the sous vide and it turned out amazing. I tested a bunch of temperature settings but I have settled on 150°F being the best. The meat comes out very juicy and tender. Initially, I cooked it for only 1 hour, but I discovered that extending the cooking time to 4 hours makes the meat even more tender by rendering more of the fat.
I am also finishing the char siu in the broiler to give it its signature charred flavor. I did 6-8 minutes and it was perfect. You might think it will overcook, but trust me, it won't. 6-8 minutes is totally fine and will not dry the meat too much.
🐖 What Cut of Pork To Use?
Pork shoulder (or pork butt) is the standard cut of meat for char siu. It has tons of intramuscular fat, which keeps the meat juicy and tender during cooking.
Some people also like to use pork belly, but I recommend pork shoulder if you want the juiciest char siu. Pork belly has a lot of fat, but the problem is most of it sits on the top of the meat, not inside it. This means you get big chunks of fat, but the meat itself is not too juicy.
🧂 Ingredients


For this recipe, you will need pork shoulder and a variety of Chinese condiments for the marinade.
The marinade consists of honey, ketchup, hoisin sauce, oyster sauce, Shaoxing wine, dark soy sauce, Chinese 5-spice powder, ground white pepper, and red fermented tofu. Most Chinese restaurants also add red food coloring or red coloring powder to give it a redder color. Personally, I do not care that much for the color so I do not add those.
For the finishing glaze, you will need 1 tablespoon of the above marinade and 2 tablespoons of honey.
🔪 Instructions

STEP 1: In a small bowl, mix together the honey, hoisin sauce, ketchup, oyster sauce, Shaoxing wine, Chinese five-spice powder, salt, Chinese preserved red bean curd, dark soy sauce, and red food coloring. Reserve 1 tablespoon for the glaze.
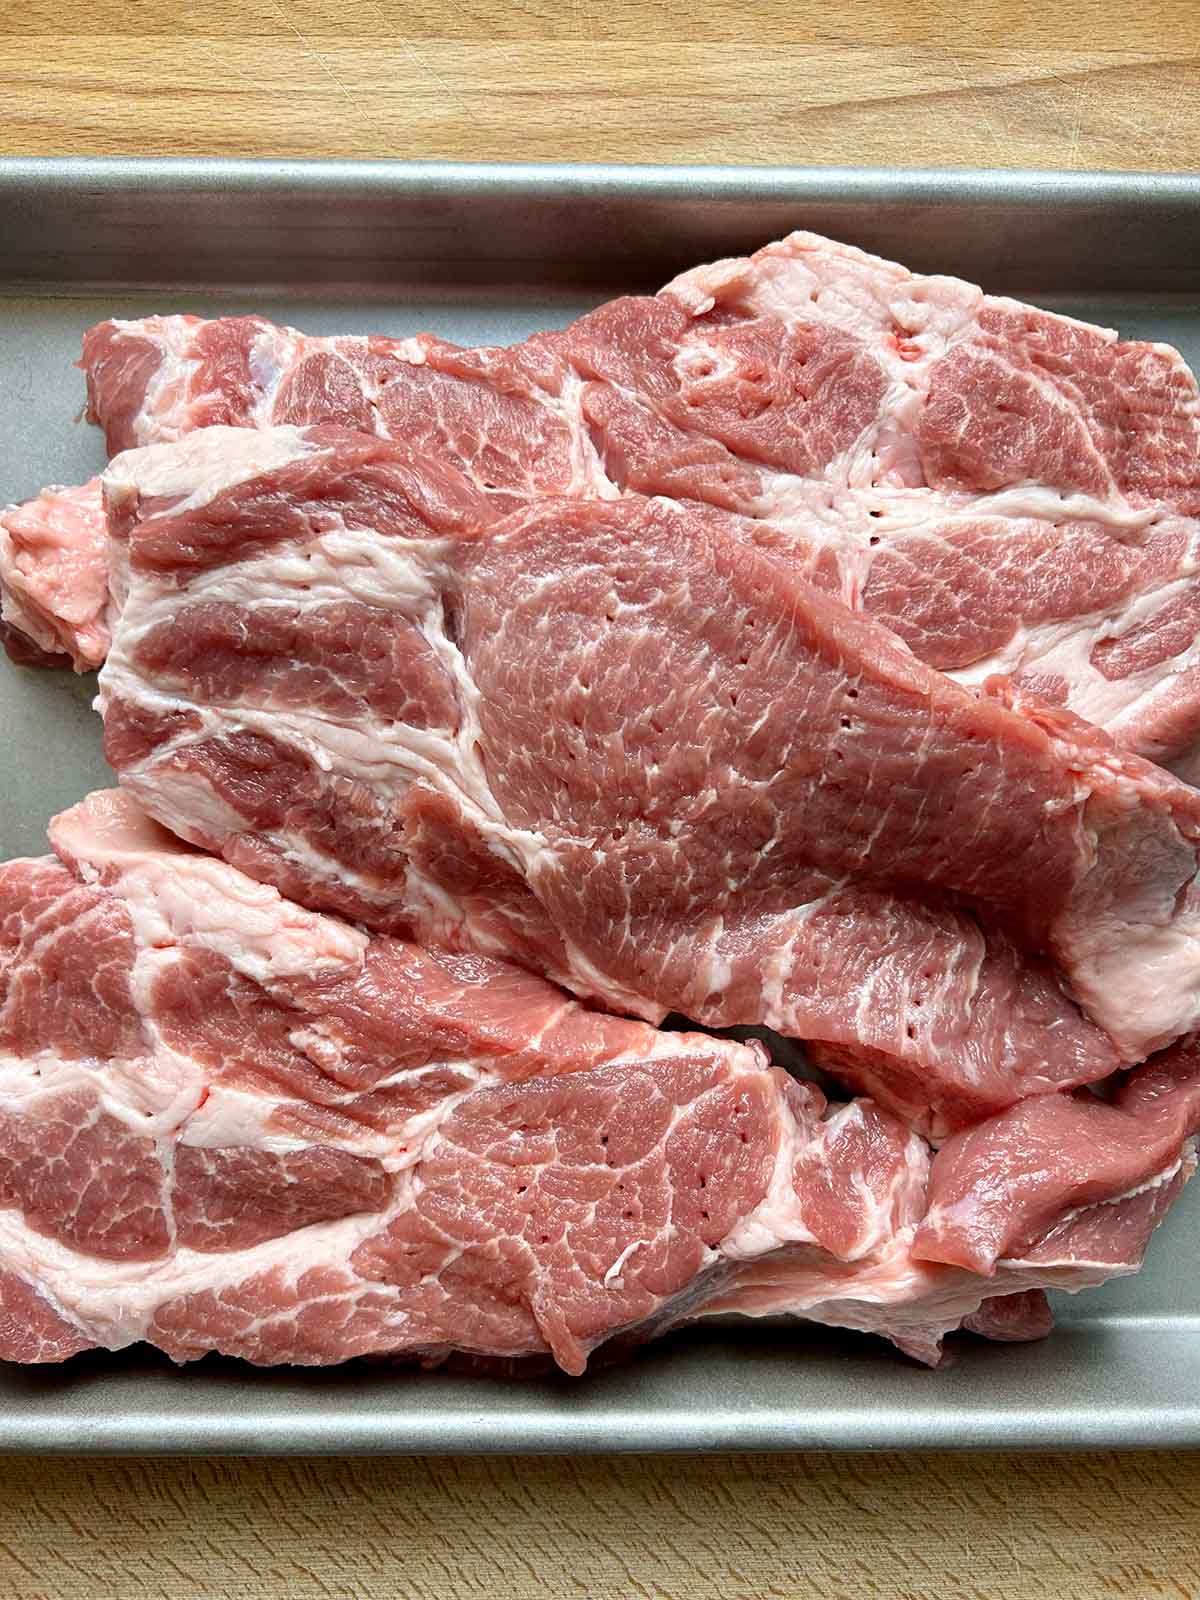
STEP 2: Slice the pork into long, 1-inch thick strips. Try to make each piece about the same thickness so that they will cook evenly when we roast them. Place the pork strips on a cutting board and use a fork to repeatedly poke holes in the meat. This will let the marinade travel deeper into the meat.

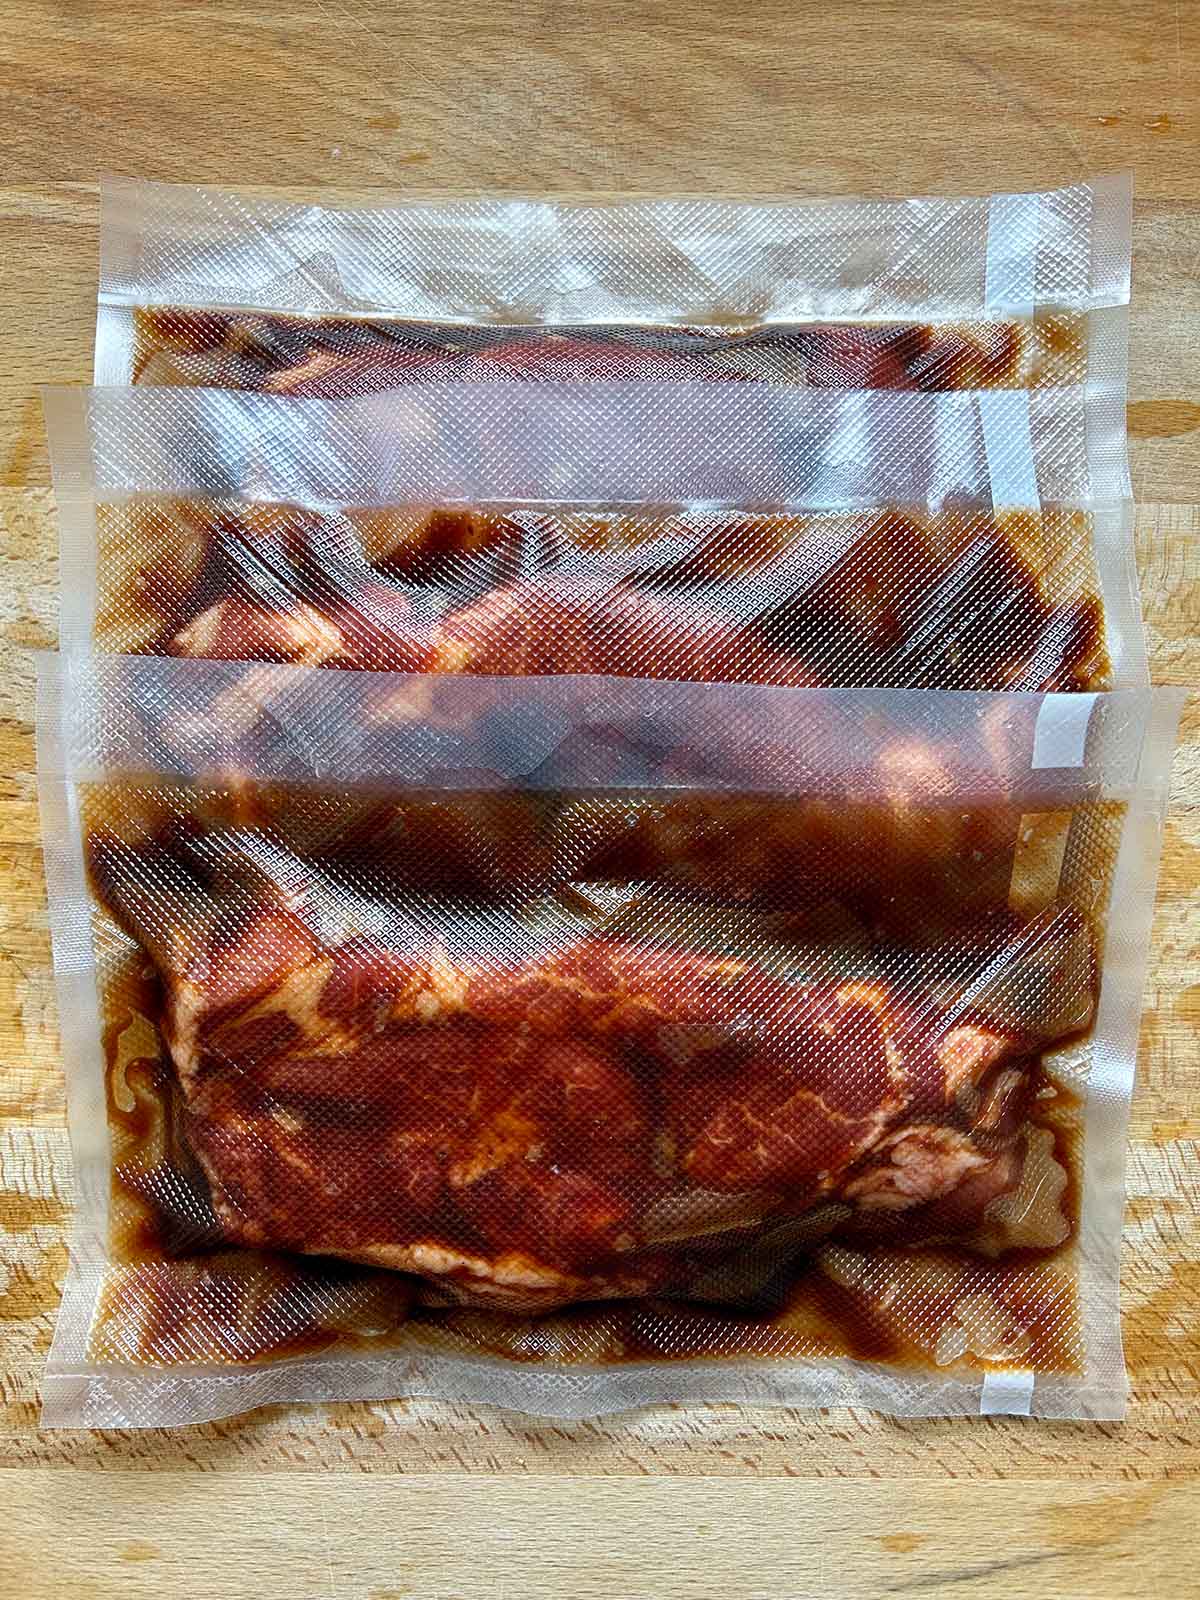
STEP 3: Transfer the pork strips, along with the marinade, to a large bowl. Massage the meat for 15-20 seconds to coat everything evenly.
STEP 4: Seal the pork strips in a single layer in 2 or 3 vacuum-sealable bags or Ziplock bags, then refrigerate for at least four and up to 24 hours. I usually let mine marinate for at least 8 hours.

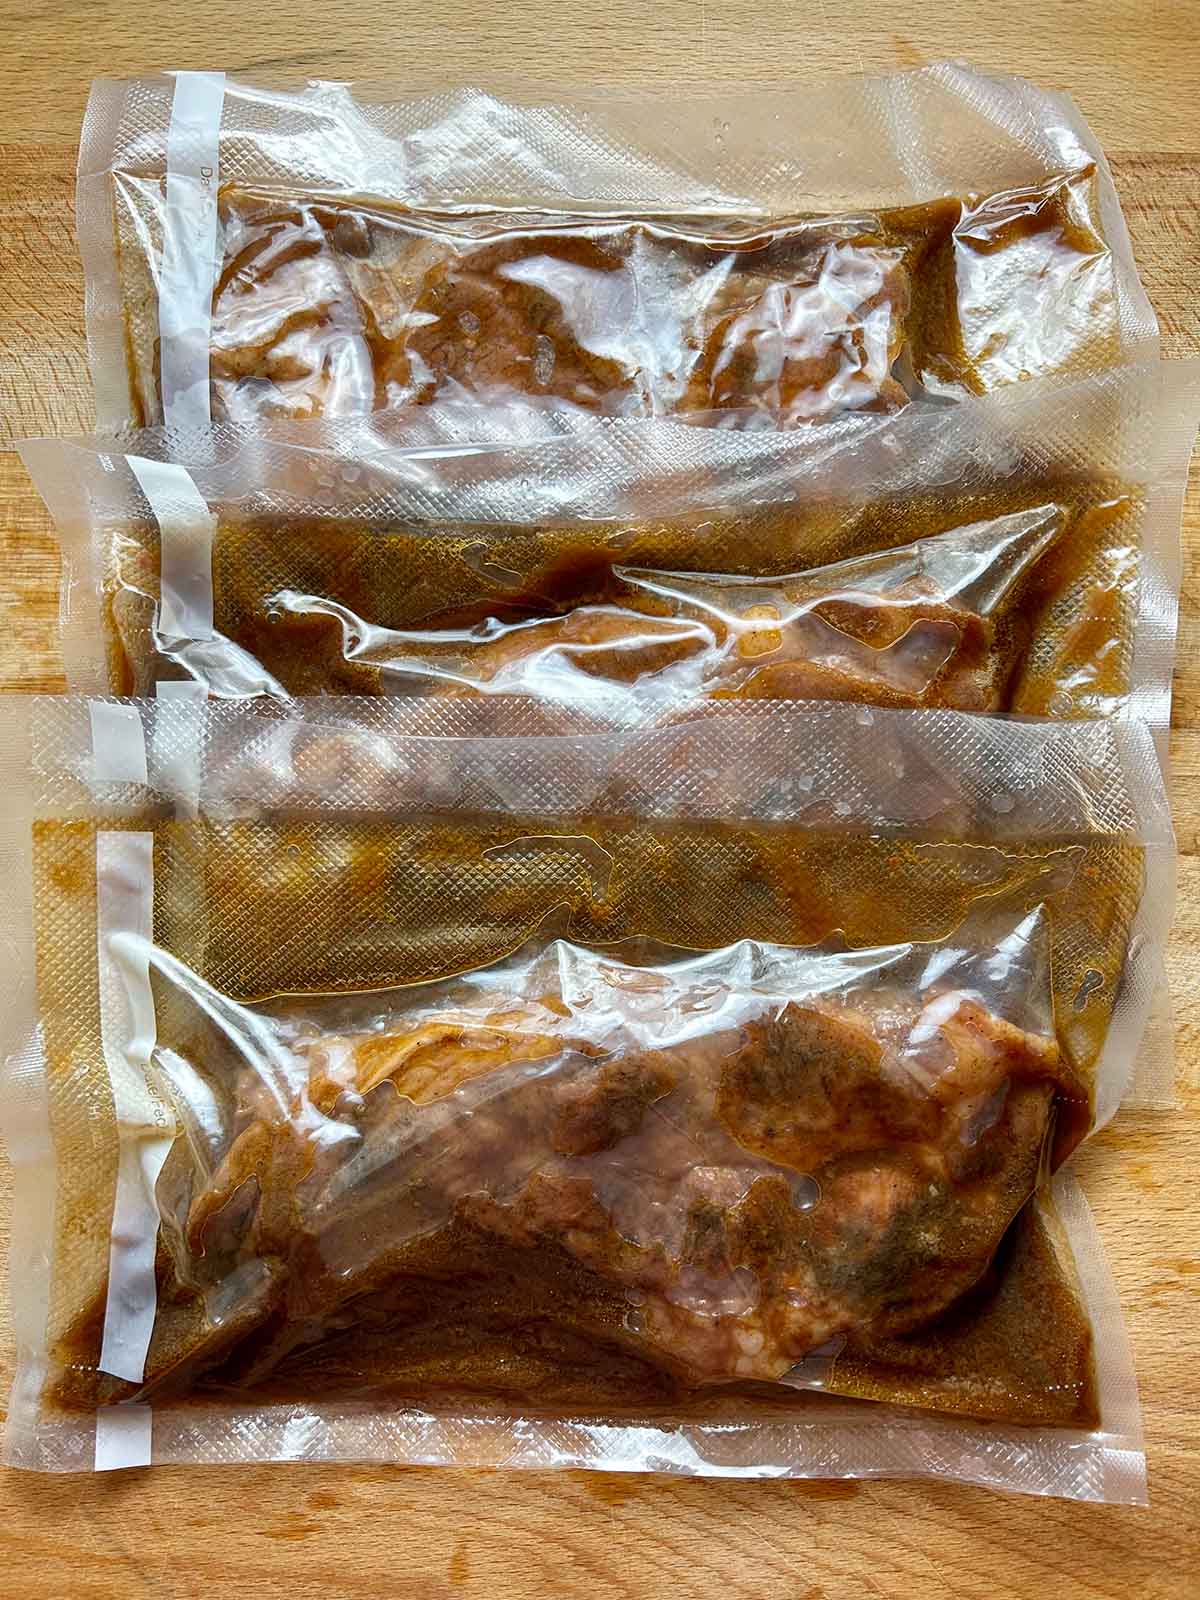
STEP 5: Preheat your immersion circulator to 150°F. Place the bags of pork into the water and cook for at least 4 hours and up to 24 hours.
STEP 6: When they are cooked, place the bags of pork in a tub of cold water for at least 20 minutes to cool them down.
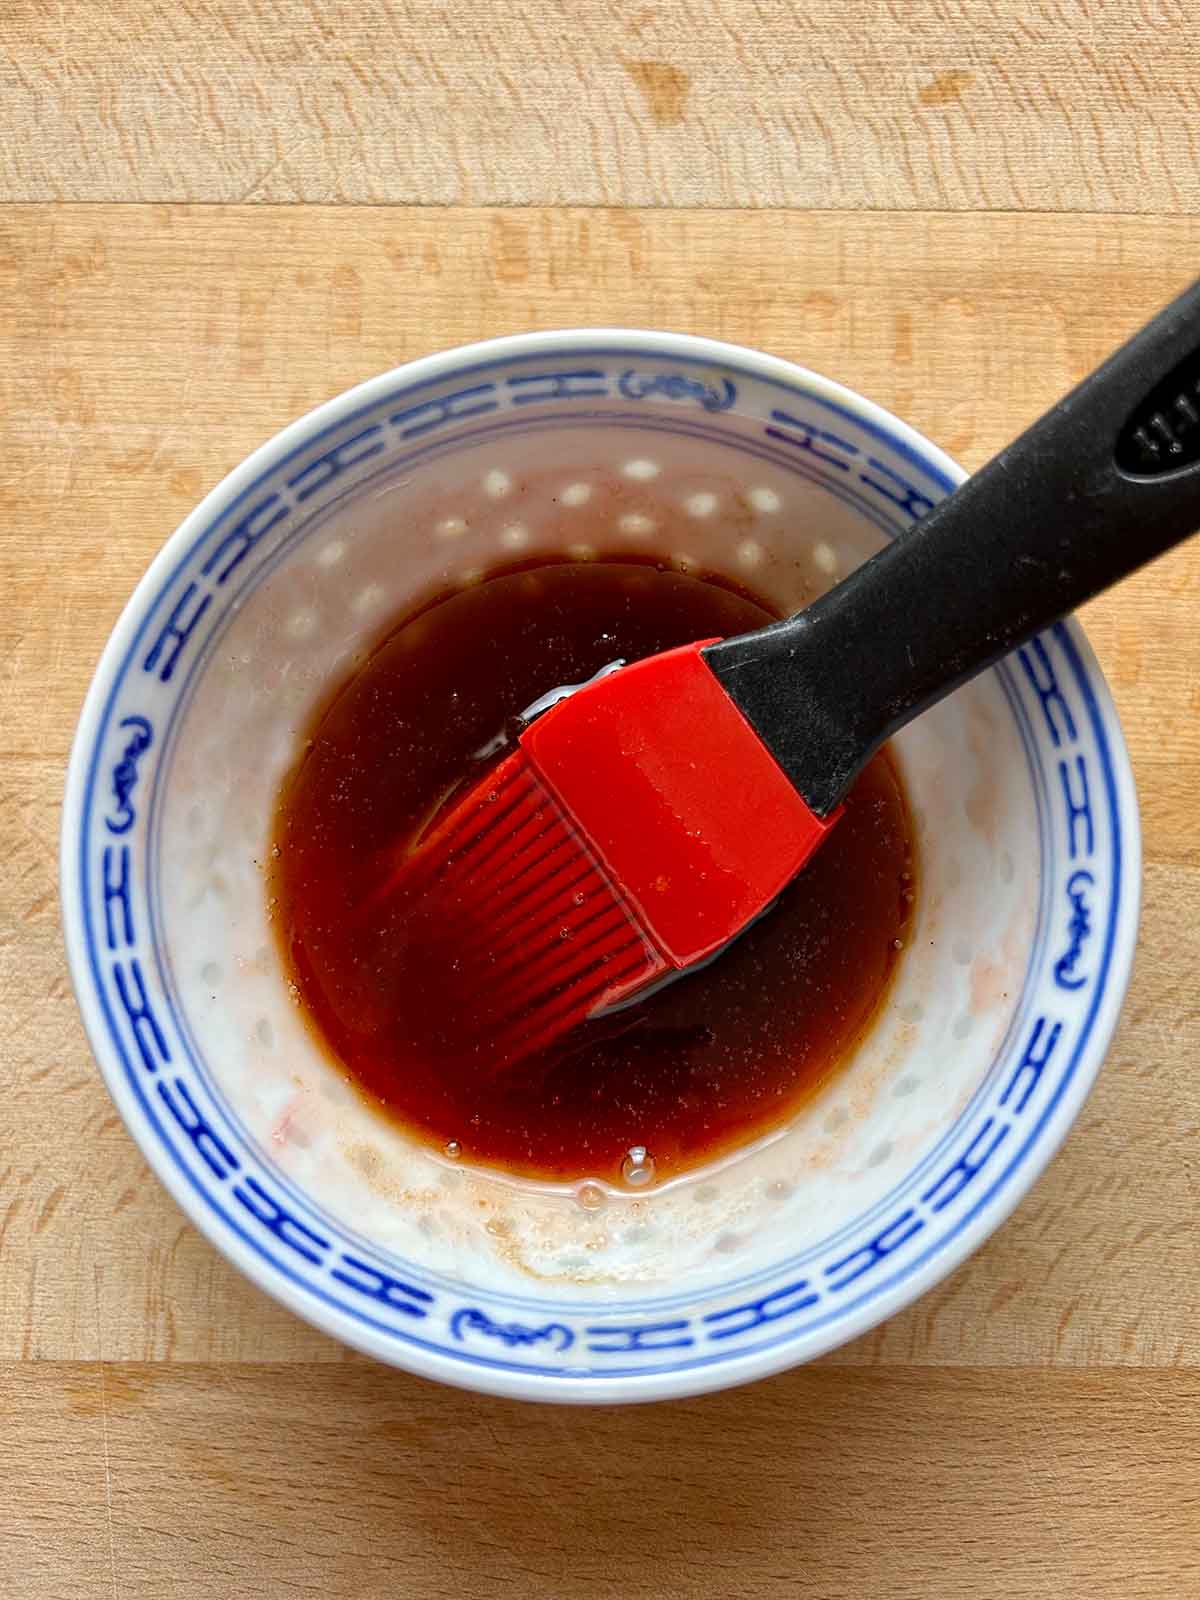
STEP 7: In a small bowl, mix the reserved marinade with 2 tablespoons of honey.
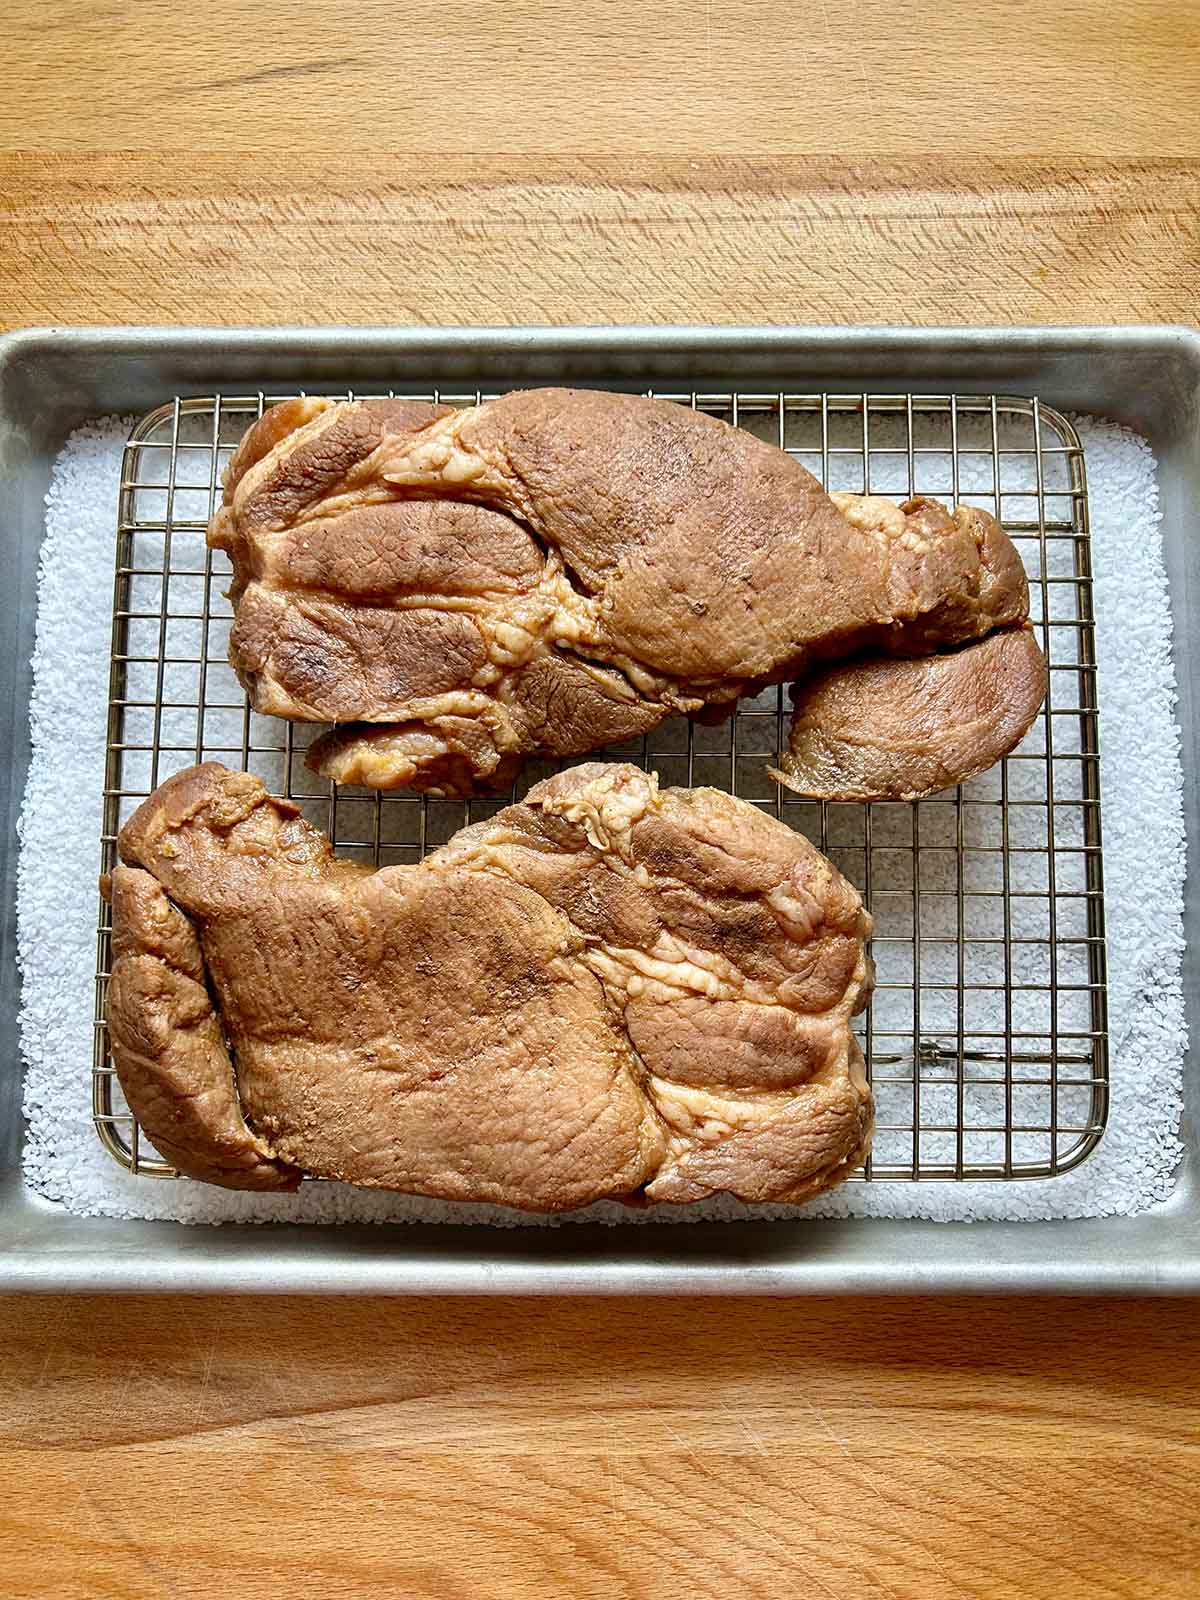

STEP 8: Now, it is time to broil them. Add 1 cup of water (or spread 1 cup of salt) on a baking sheet and place a wire rack on top. The water (or salt) helps prevent drippings from burning and creating smoke.
STEP 9: Place pork strips on the wire rack and brush the top and sides with the glaze.

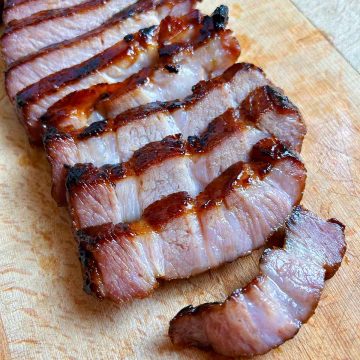
STEP 10: Place pork strips on the top rack and cook for 3-4 minutes until the marinade starts caramelizing. Add another layer of glaze and broil for another 3-4 minutes.
I used a thermometer to check the temperature of the pork before applying the second layer of glaze. If the temperature of the pork is getting too high (try to keep it below 150°F), remove the pork and don't broil it any further.
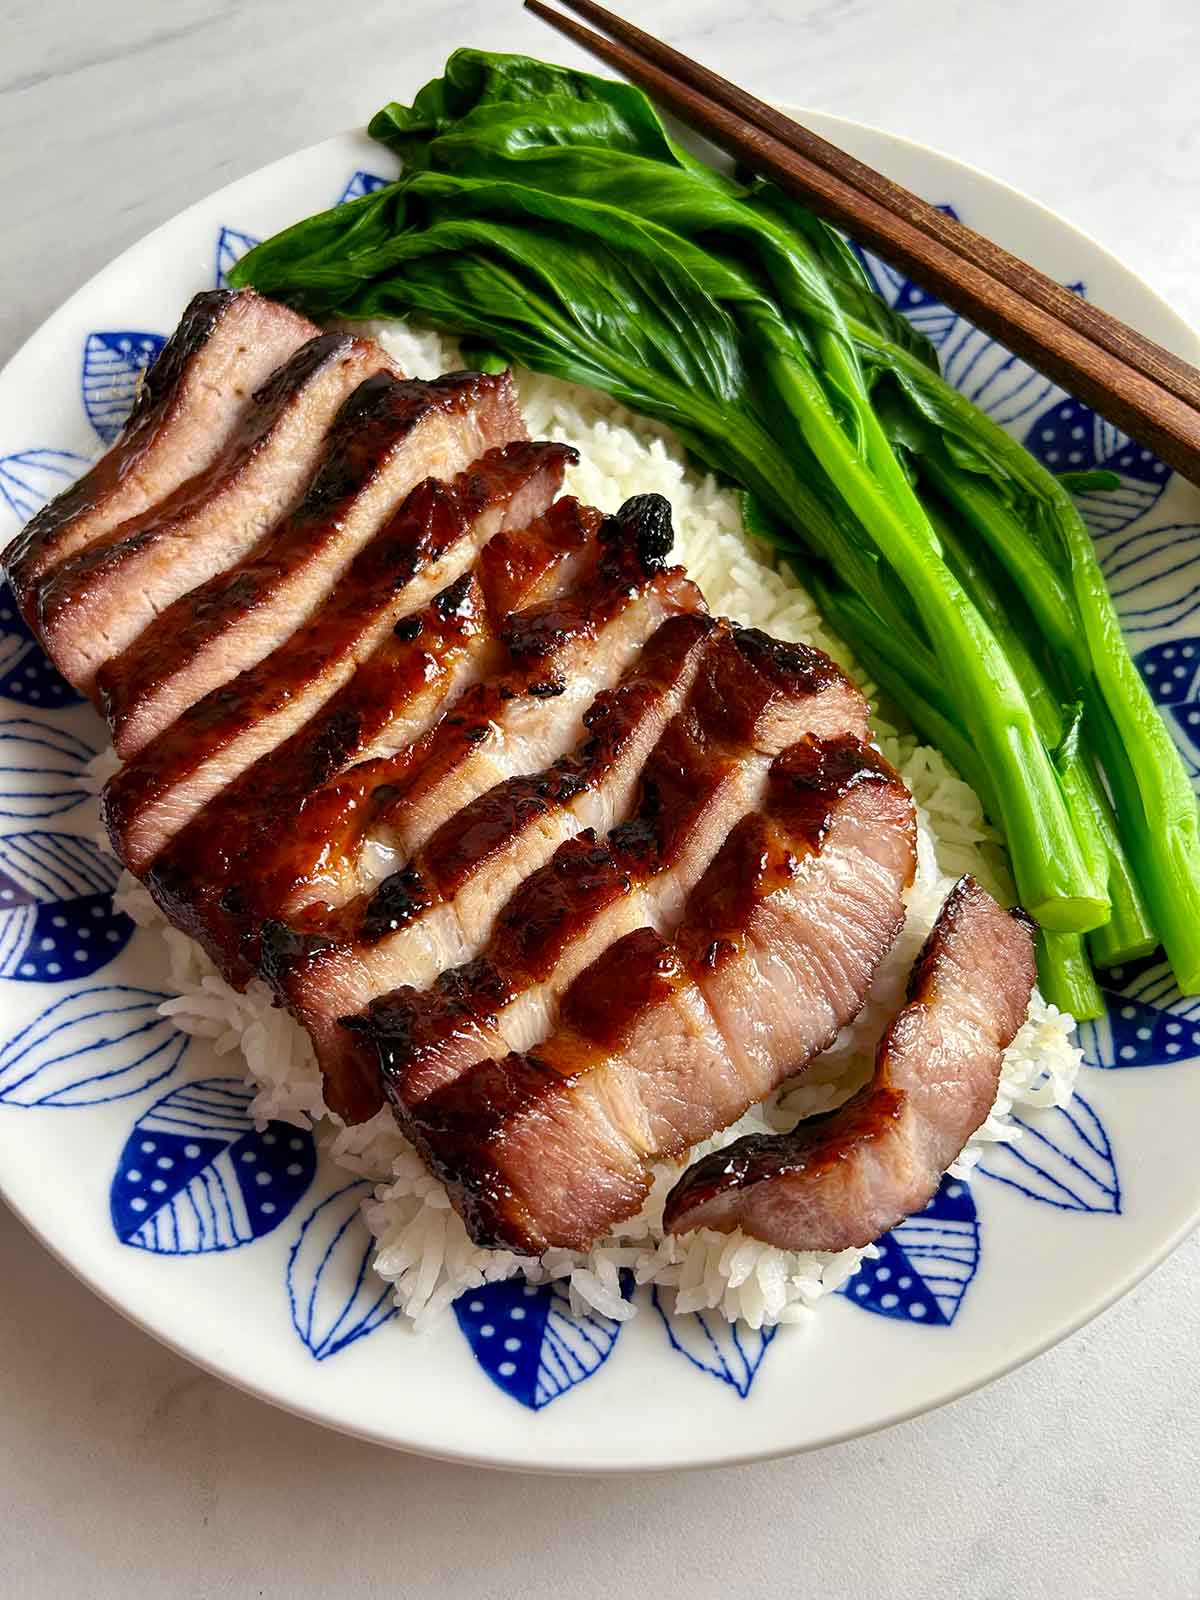
Let the sous vide char siu rest for at least 10 minutes before cutting. Serve it with a bowl of rice and Chinese greens, or slice it thinly and make char siu fried rice.
📋 Recipe
Sous Vide Char Siu (BBQ Pork)
Ingredients
- 3 pounds pork shoulder/butt
Marinade
- ¼ cup honey
- ½ cup hoisin sauce
- ¼ cup ketchup
- ¼ cup oyster sauce
- 3 tablespoons Shaoxing wine
- 2 tablespoons dark soy sauce
- 2 cubes red preserved bean curd (smashed)
- 1 teaspoon Chinese five-spice powder
- ¼ teaspoon ground white pepper
- ½ teaspoon coarse kosher salt
- ¼ teaspoon red food coloring (optional)
Glaze
- 2 tablespoons honey
- 1 tablespoon reserved marinade
Instructions
- In a small bowl, combine all the marinade ingredients. Reserve one tablespoon of the marinade for the glaze.
- Slice the pork into long, 1-inch thick strips. Try to make each piece about the same thickness so that they will cook evenly when we roast them. Place the pork strips on a cutting board and use a fork to repeatedly poke holes in the meat. This will let the marinade travel deeper into the meat.
- Transfer the pork strips, along with the marinade, to a large bowl. Massage the meat for 15-20 seconds to coat everything evenly. Seal the pork strips in a single layer in 2 or 3 vacuum-sealable bags or Ziplock bags, then refrigerate for at least four and up to 24 hours.
- Preheat your immersion circulator to 150°F. Place the bags of pork into the water and cook for at least 4 hours and up to 24 hours.
- When they are cooked, place the bags of pork in a tub of cold water for at least 20 minutes to cool them down. Meanwhile, make the glaze by combining the reserved marinade with 2 tablespoons of honey.
- Now, it is time to broil them. Add 1 cup of water (or spread 1 cup of salt) on a baking sheet and place a wire rack on top. The water (or salt) helps prevent drippings from burning and creating smoke.
- Place pork strips on the wire rack and brush the top and sides with the glaze.
- Broil at 500°F for 3-4 minutes until the marinade starts caramelizing. Add another layer of glaze and broil for another 3-4 minutes. Let the char siu rest for at least 10 minutes, then serve.


Leave a Reply