These Chinese Chicken Balls are puffy on the outside, juicy on the inside, and served with the best sweet and sour sauce. Learn how to make batter for chicken balls the right way!
Do you love Chinese buffet-style food? Try my Sweet And Sour Pork next!

🥡 About This Recipe
Chinese Chicken Balls are one of the popular items at Chinese takeout restaurants. I remember getting them as a kid, and they were always crispy, puffy, and super tasty. The crust is slightly sweet (like with most Chinese takeout foods), but what sets them apart is their round and puffy shape.
The first time I tried making it, I failed terribly, but after a bit of experimentation, the recipe is now perfect. The secret to the puffed look is all in the ingredients, and I'll explain more about it below.
🍗 The Chicken Ball Batter
The chicken ball batter is made with flour, cornstarch, baking powder, sugar, and salt. The baking powder is the key ingredient that allows the batter to puff up when it's fried.
I've done several trials, and you need a good amount of it to puff properly. I recommend about one teaspoon of baking powder per cup of dry ingredients.
Some recipes use self-rising flour or carbonated water to achieve the same effect, but I never have those ingredients on hand, so I think baking powder is much more convenient.
🧂 Ingredients

- Chicken: I'm using chicken breasts, but you can use chicken thighs too. In Chinese cooking, we generally prefer chicken thighs since they're juicier and more flavorful. I believe Chinese chefs initially used chicken breasts for this dish because it is what Americans preferred.
- Batter: Cornstarch, all-purpose flour, baking powder, sugar, salt, and cold water. Make sure the water is cold, I leave it in the fridge until it's needed. This will slow down the gluten development so the crust is crispier.
🔪 Instructions
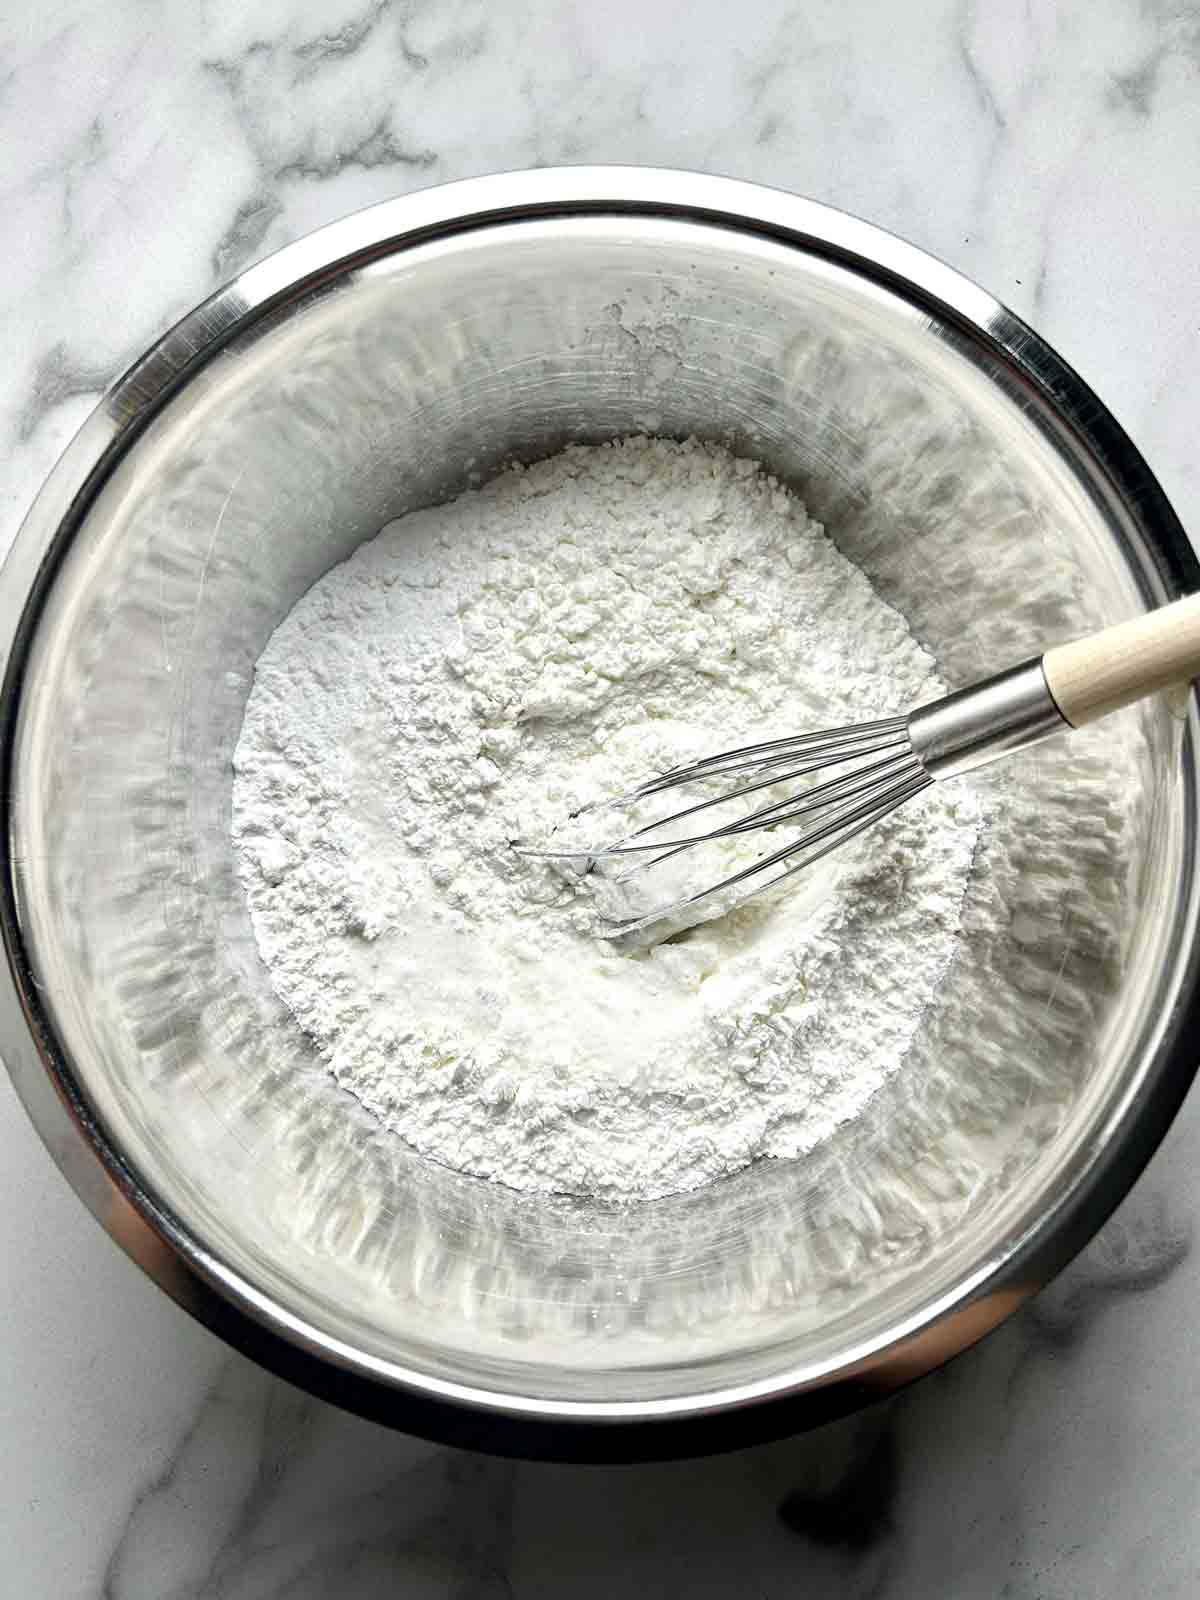
STEP 1: In a large mixing bowl, whisk together the cornstarch, flour, sugar, baking powder, and salt.
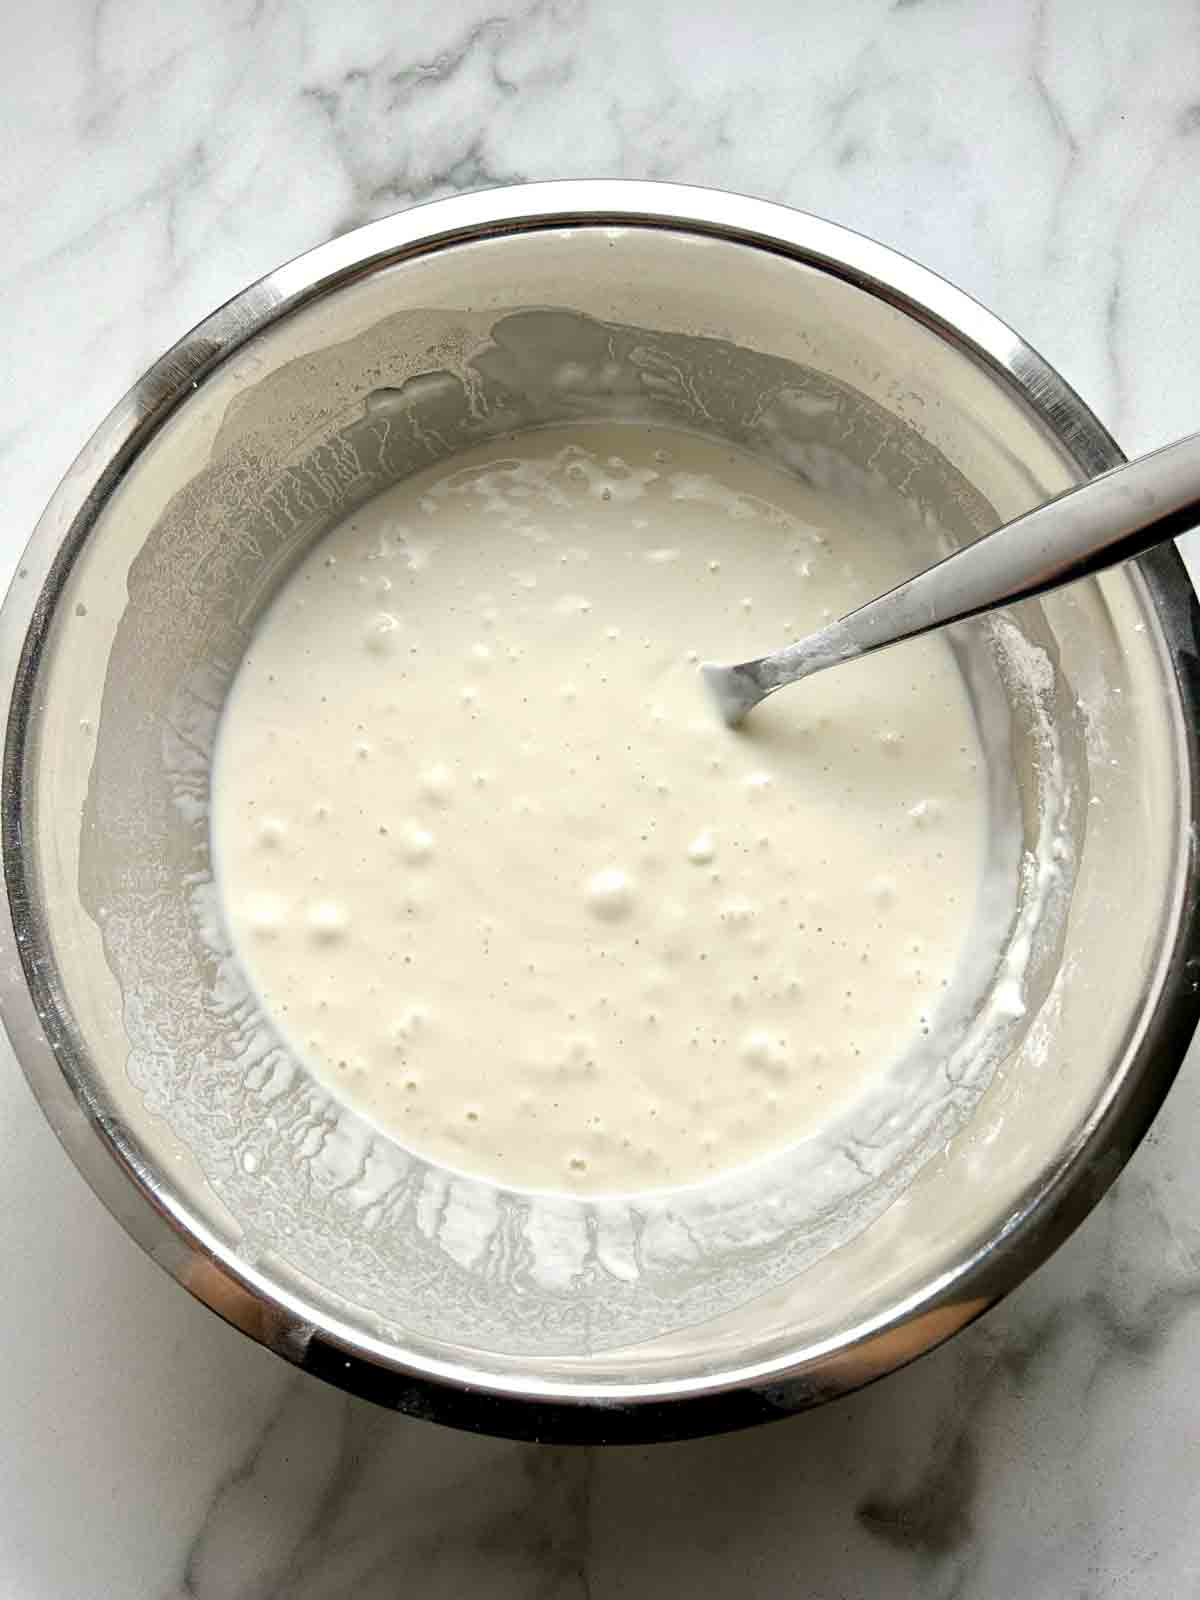
STEP 2: Stir in the cold water until it is mostly smooth. The batter should be thick enough so that the crust can hold its shape during cooking. If you dip a piece of chicken into the batter, the batter should cover it fully and slowly drip off. Add extra flour or water as necessary.
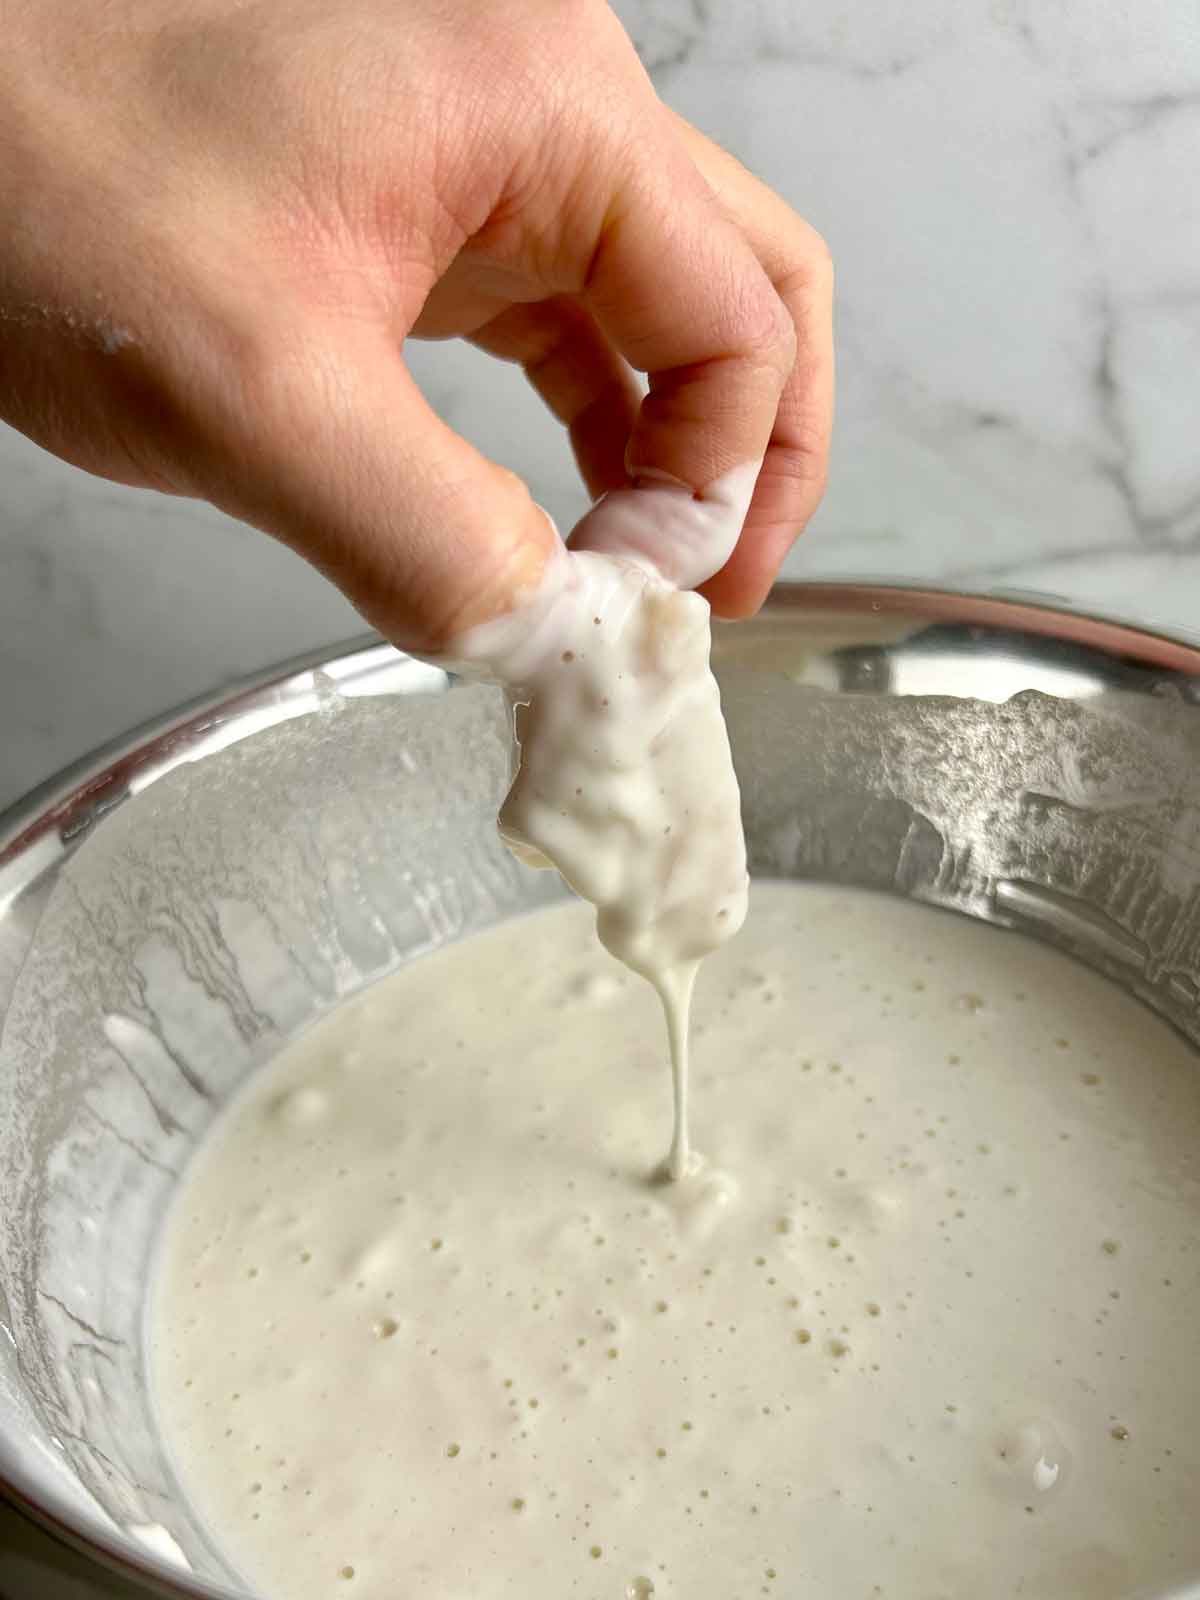
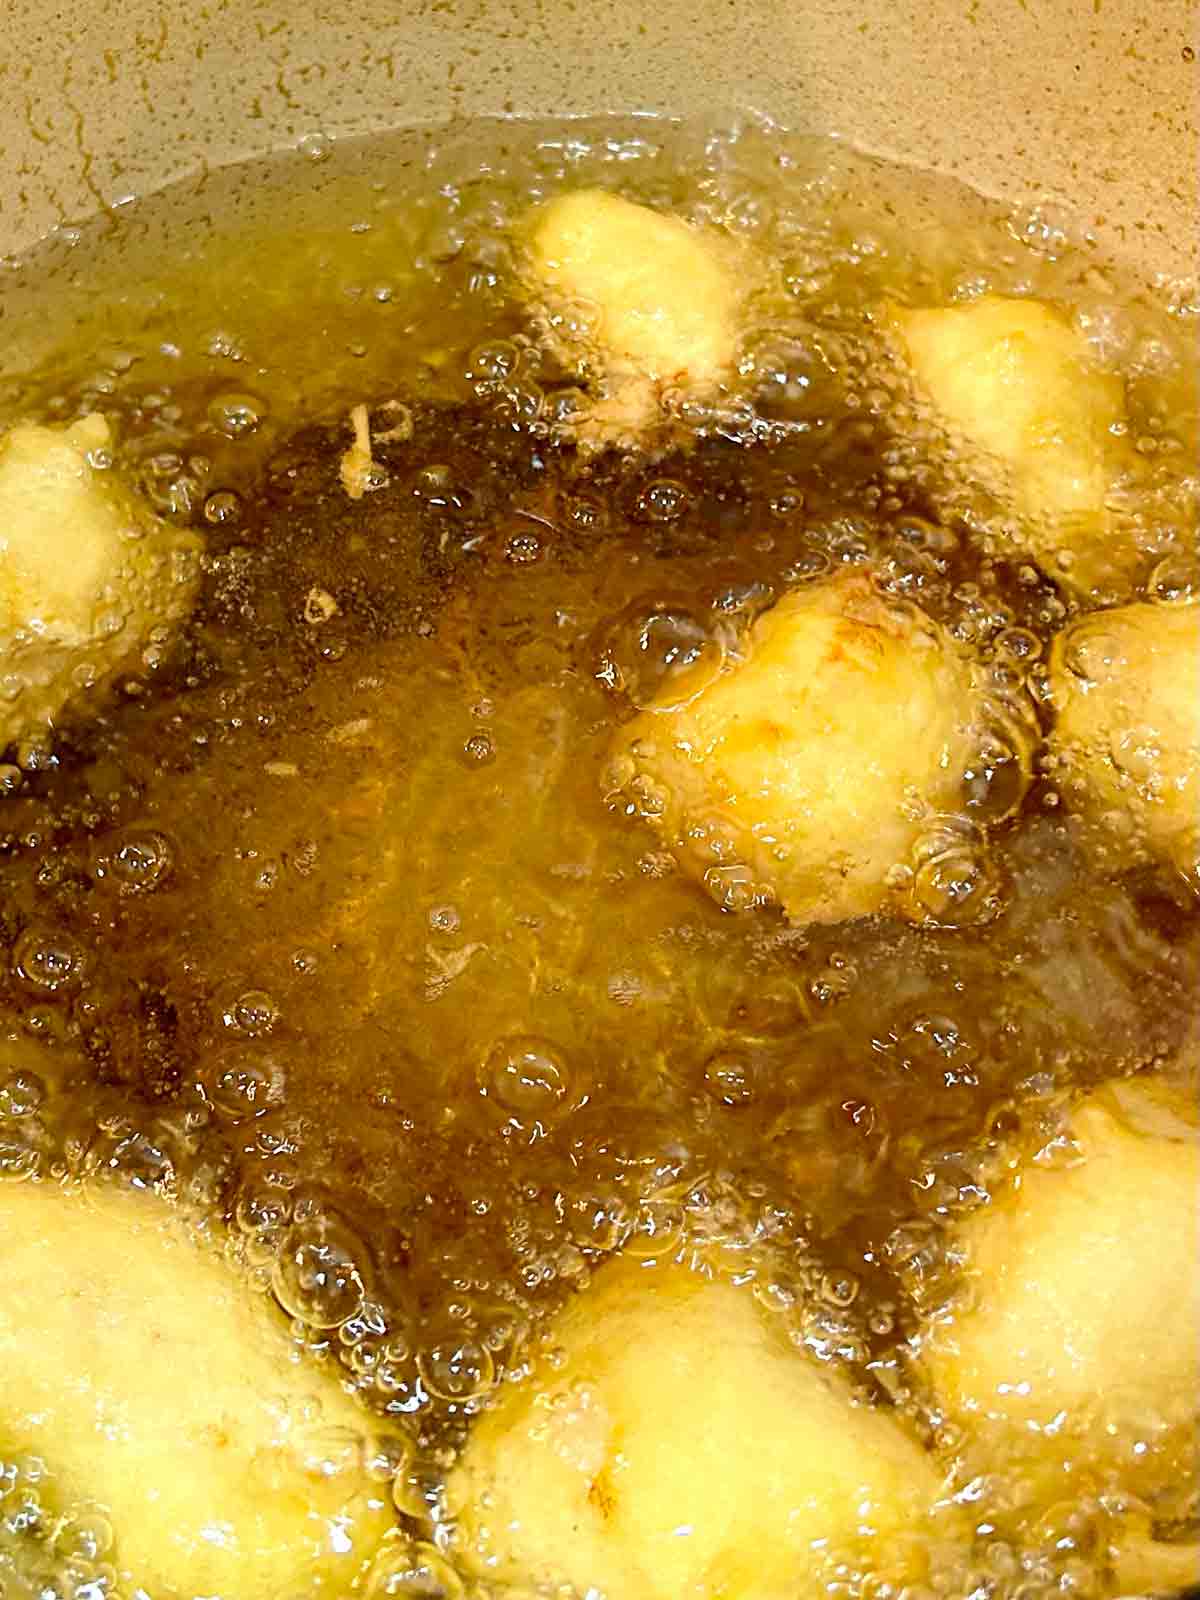
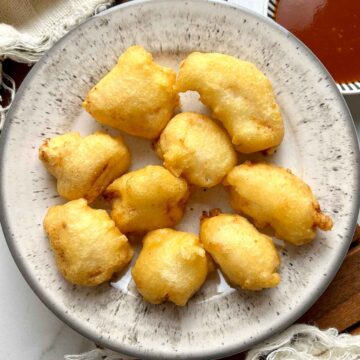
STEP 3: Dip a chicken piece in the batter, ensuring it's completely covered. Let the excess drip off and then lower into the hot oil. You can cook about 8 or 10 at a time. Cook for 3-4 minutes on each side or until golden brown. Be careful not to overcook them, as chicken breasts get dry easily. Transfer to a wire rack to drain.
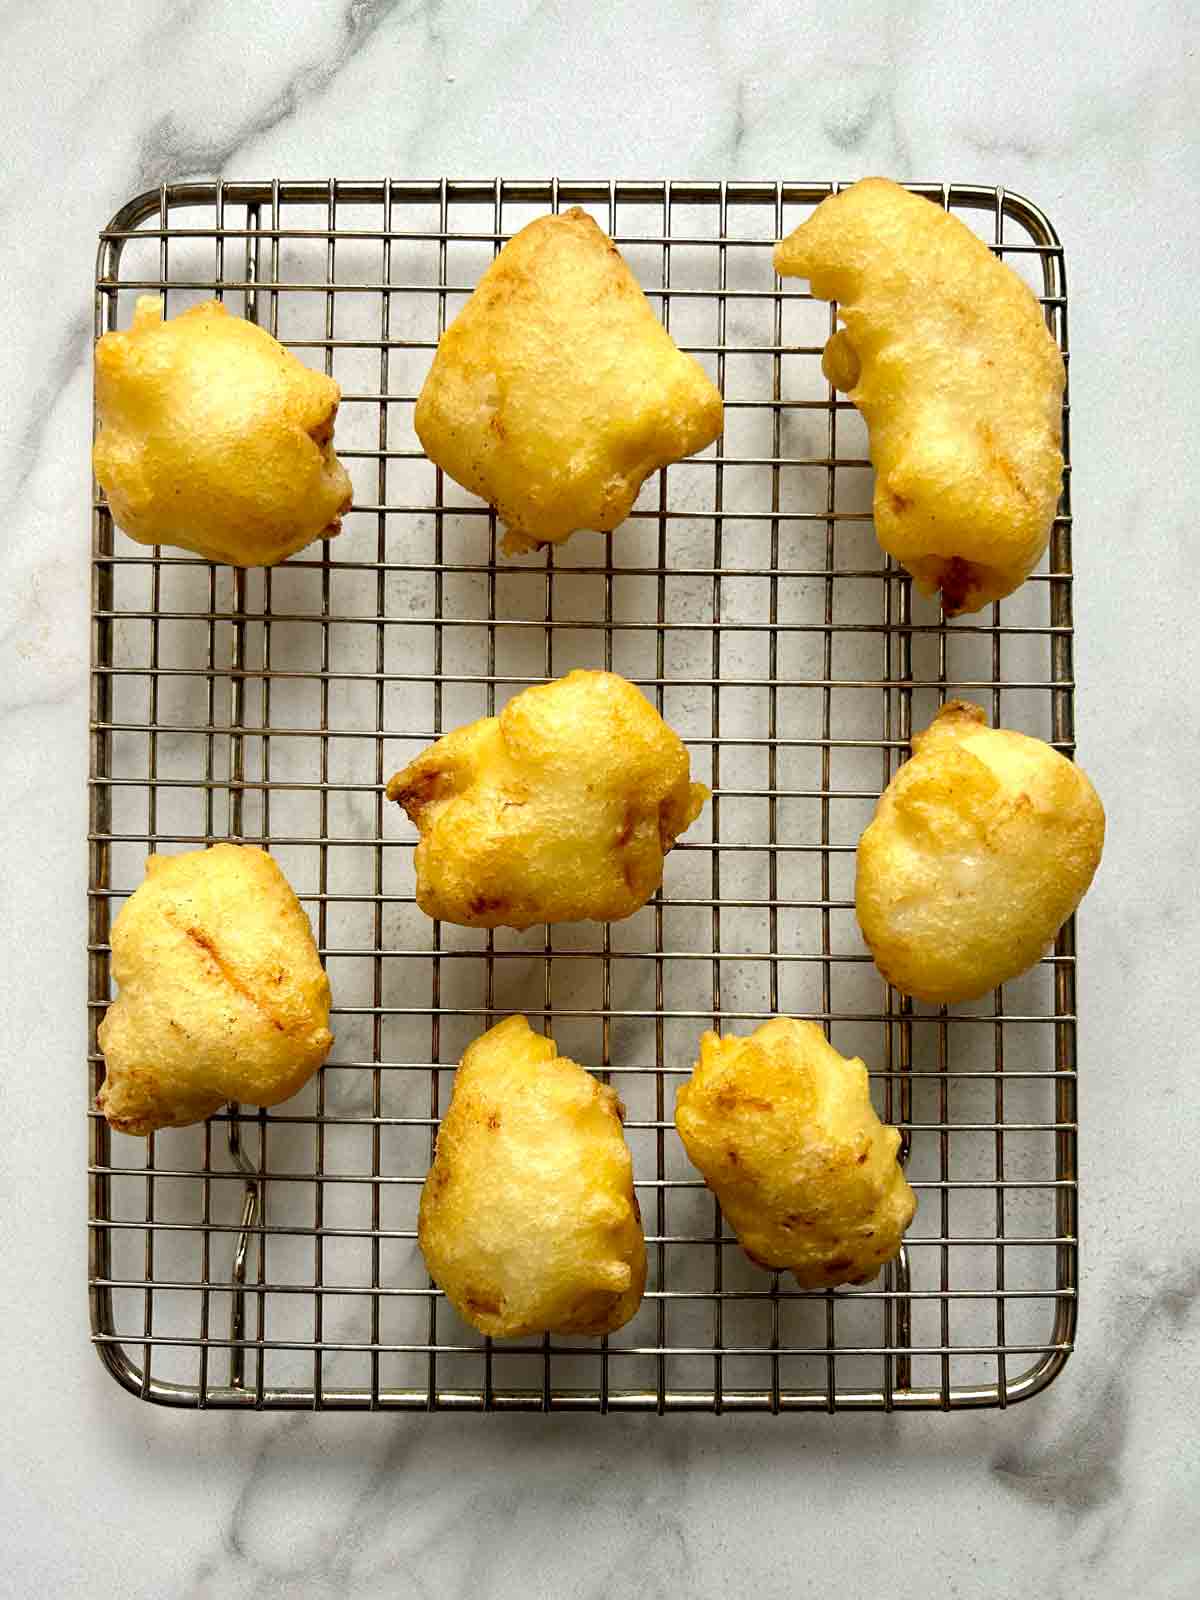
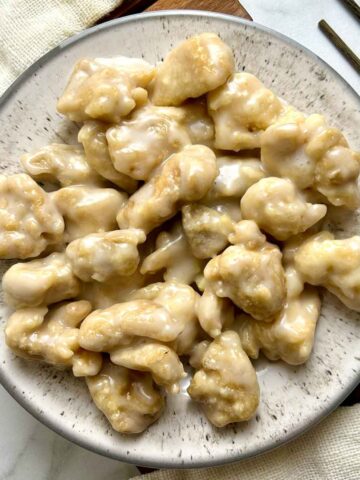
At this point, they're ready to eat. The classic way to eat them is with a side of sweet and sour sauce. Recipe below.
🥫 Sweet And Sour Sauce
This recipe is super easy to make, and the sauce keeps well in the fridge for up to two weeks. I have worked on this recipe for the better half of my life and I think it tastes better than any restaurant. Fresh lemon juice is key for getting a good flavor. Do use the bottled stuff.

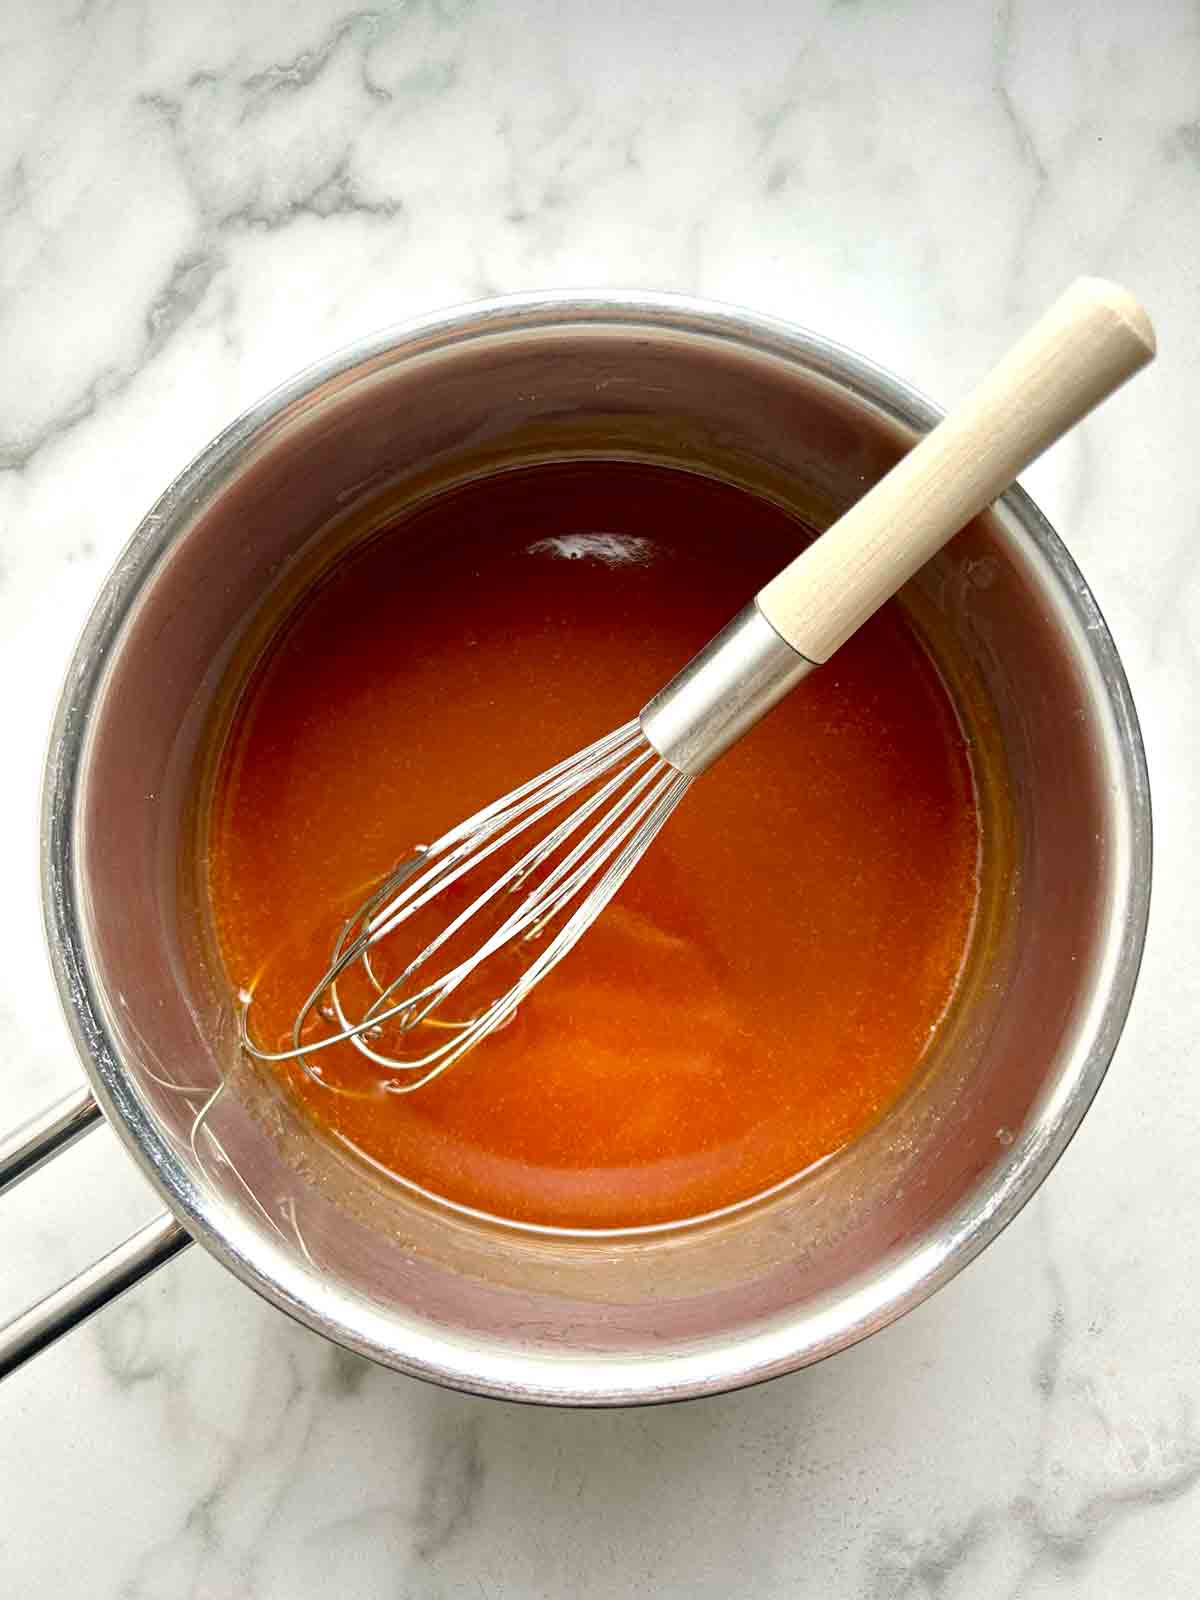
STEP 1: In a small saucepan, bring brown sugar, ketchup, lemon juice, vinegar, water, and cornstarch to a boil. The sauce should thicken slightly. Remove from the heat and set aside until serving.
Note: I prefer the sauce to be on the runner side. If you want it thicker, you can add a little bit more cornstarch. And make sure you dissolve it in a little water first to prevent it from clumping.

📋 Recipe
Chinese Chicken Balls With Sweet And Sour Sauce
Ingredients
Sweet Sour Sauce
- ½ cup water
- 3 tablespoons ketchup
- 6 tablespoons brown sugar (or white sugar)
- 2 tablespoons vinegar
- 1 tablespoon lemon juice
- 1 ½ teaspoons cornstarch
- ½ teaspoon salt
Chicken Balls
- 1 cup cornstarch
- 1 cup all-purpose flour
- 1 tablespoon sugar (or honey)
- 2 teaspoons baking powder
- 1 teaspoon coarse kosher salt
- 1 ½ cups cold water
- 3-4 chicken breasts (cut into 1-inch chunks)
- neutral oil (for frying)
Instructions
Sweet and Sour Sauce
- In a small saucepan, combine all the sauce ingredients and bring to a boil. Remove from the heat and set aside until serving. The sauce will keep in the fridge for up to two weeks.
Chicken Balls
- In a large mixing bowl, whisk together the cornstarch, flour, sugar, baking powder, and salt.
- Stir in the cold water until it is mostly smooth. The batter should be thick enough so that the crust can hold its shape during cooking. If you dip a piece of chicken into the batter, the batter should cover it fully and slowly drip off. Add extra flour or water as necessary.
- Dip a chicken piece in the batter, ensuring it's completely covered. Let the excess drip off and then lower into the hot oil. You can cook about 8 or 10 at a time. Cook for 3-4 minutes on each side or until golden brown. Be careful not to overcook them, as chicken breasts get dry easily. Transfer to a wire rack to drain, then serve immediately with the sweet and sour sauce.


Grump
Hi Em, I think you're right about the sauce! I actually made this again a few days ago and realized it would taste better with a bit extra sugar. I've updated the recipe 🙂
Kathleen
Loved this recipe! I didn’t make the sauce, the chicken was perfect!
Grump
Awesome Kathleen, thanks for trying the recipe!
Angela
Tried this tonight! Absolute delight!!
Kathie Wells
This was the lightest crispiest batter I have ever tried. Delicious!